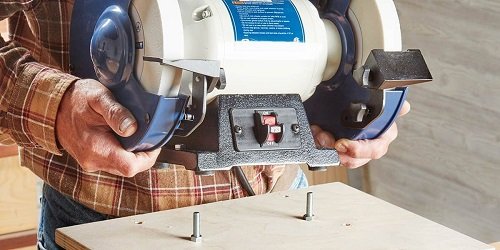
A bench grinder is a grinding machine of the benchtop type which is used to drive abrasive wheels.
It’s basically able to grind any item you throw its way –as long as you use it properly.
Moreover, you can use your bench grinder to shape, sharpen, polish, buff, or even clean any metal object.
Applications of a Bench Grinder
1. Setting Up
Before you begin working with your grinder, make sure you set it up correctly.
Having “friable” wheels is a great place to start.
This indicates that the particles of the wheel break away and expose new, fresh edges when it starts to get worn out. As a result, any excessive friction is eliminated.
Furthermore, having a good tool rest that isn’t too rough, big, and easy to adjust would make the whole grinding process easier.
Finally, you should dress the wheel. Despite the popular opinion, it shouldn’t be flat across the front but rather rounded slightly with a high point in the middle.
If you want to knock back the edges of the wheel a little to get a curve across the front, you can use a flat diamond dressed.
2. Using Angle Gauges
If you want your cutting tool to work at its best performance, its edges should be ground at the correct angle.
For example, the average wood chisel would require a 25◦ angle with a 30◦ secondary micro-bevel angle at the tip of the blade.
To set the tool rest at the ideal angle and get the best result, you should use an angle gauge, which you can either use or make on your own.
3. Sharpening a Chisel
The best way to securely rest your work as you sharpen a chisel is to use a reliable bench grinder.
With a tight grip on the chisel, push the blade slowly to the grinder at an angle that is slightly up or down-tilted –depending on how the blade tapers off.
This way, you can ensure that the grinder does its job without any excess sharpening.
If your chisel uses a 60-grit wheel –and most of them do-, then a forward and backward motion is recommended such as that used in shaping wood.
You should be careful not to heat up the tool with excessive friction that it turns orange. If your chisel gets warm, dip it in a bucket or a pot of water to cool it down.
4. Buffing or Shaping Wood
This means curving the wood at particular places by touching it to the grinder.
To get the best results, you should do this slowly and lightly.
Moreover, move your piece back and forth to get the most accurate cuts and consequently, the perfect finish.
Using a 36-grift buffing wheel to shape or buff wood with a slow operation speed is the ideal set up.
And when it comes to buffing particularly, apply the wax first and then polish your piece after the wax has dried.
5. Cutting Metal Pieces
To cut a piece of metal, hold the piece on the tool rest and gently turn it until it comes in contact with the grinder at the exact spot you want to cut.
After that, keep turning it until it breaks in half. To get the cleanest cut, hold both ends of the piece steadily.
When you’re done, dip the hot ends in water to cool them down.
Understanding the Parts of a Bench Grinder
Understanding how your tool works and its particular parts may help you understand its applications better and how you can use it. So here’s a simple way to describe the parts of a bench grinder.
Wheel Speed
RPM (Rotations per Minute) ratings can vary from one grinder to another and it’s the factor that dictates what types of metal your grinder would be able to cut.
You shouldn’t count on over-speeding the grinder as this might lead to serious safety issues.
Tool Rest
A tool rest is the part of the grinder that guarantees stability and prevents any slips from happening.
Coolant
Not all grinders come with this feature, but the ones that do are called wet grinding machines.
Having a built-in coolant spares the user the need to dip their workpieces in water to cool them down.
Wheel Guard
The main purpose of wheel guards is to serve as an intercept to stop the grinder from exploding.
This is done by creating a guard around the wheels of the grinder. Also, you can check the 8 Best Bench Grinders (Reviews)
Final Thoughts
Using a bench grinder is quite easy and simple once you’ve figured out the ideal way to operate it.
Just attach the wheel that suits the job in terms of roughness and the material you are grinding, practice the technique, secure everything in place, and you’re good to go.
